All’s Well That Ends in Pink Sequin (Or, How to Knit & Sew Cuffed Christmas Stockings)
After about ten years of dreaming about taking a cross-country train ride, I finally did. Unlike the overnight trains of my dreams, every surface was in fact not covered in red velvet. Still, stepping into another reality—where strangers have inside jokes and play Uno together, adults are rocked to sleep, and people are not in a hurry for, well, anything— Highly recommend.
I settled into my sleeper car, excited for 28 hours of cup-filling activities: listening to money podcasts, staring out the window, reading The Creative Life, brainstorming with ChatGPT, and knitting a special holiday project. Magical.
With Christmas around the corner, the knitting project at hand felt meaningful and practical: a ribbed cuff for the linen Christmas stocking I planned to make for my new husband.
The Knitted Cuff
The materials: 10 ¼” wooden 7mm needles and some chunky forest green speckled yarn (festive, earthy, cozy).
The pattern: Thick stripes—
Row 1: Knit 3, Pearl 2, Knit 2, Pearl 2, Knit 2, Pearl 2, Knit 2, Pearl 2, Knit 3
Row 2: Pearl 3, Knit 2, Pearl 2, Knit 2, Pearl 2, Knit 2, Pearl 2, Knit 2, Pearl 3
—repeated until my knit was about 16” long. The extra stitch along both edges gave the top and bottom of the cuff a nice full look.
Back home, in the quiet of early, dark winter mornings I finished the knitting and was ready to sew.
Getting settled into sewing always takes me a hot hour, during which I’m rummaging through piles of to-be-donated clothes, neglected towels and pillowcases relegated to far corners of closets and cabinets, and boxes of fabrics, all in an attempt to use something I’ve kept around for this vary occasion while trying to convince myself I won’t later come up with a better use of the thing and regret my decisions terribly…. Yeah, it’s dramatic.
The laps around the house did however result in the perfect lining for the stocking: more linen, of course! Three reasons why it’s so great:
Linen gets softer over time, making it a material aligned with a concept in permaculture of, whenever possible, choosing assets that gain value over time versus ones that degrade and depreciate.
Linen is generally woven in a way that makes it reversible. Most of the time, both sides of the fabric are beautiful, so you don’t have to worry about right and wrong sides when sewing. Simplicity, baby.
It’s timeless and just the coziest.
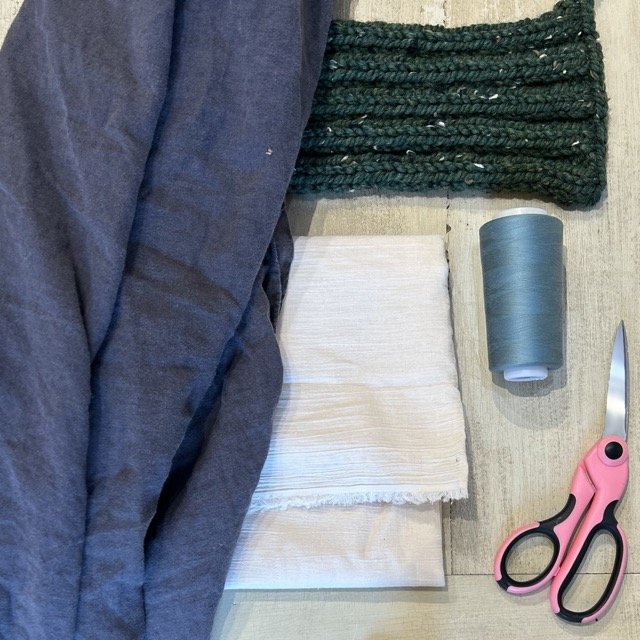
Materials and tools in hand—
Knitted cuff
Fabric
Sewing machine, thread, pins
Scissors
Paper, pencil OR printed pattern
Fabric pen (ideal because the ink disappears, but we can make do without it)
—we’re ready for action.
Below you’ll find a brief step-by-step. But first, a little PSA.
Now, reader, this post is the first instructional on Desk to Dirt (woot!), and you might find that we do things a little differently here.
There’s many a time and place for detailed tutorials on how to make things, and plenty of reasons to seek them out: maybe you want to enter a competition; maybe you are tempted to impress the super-judgy-folk in your life; maybe you are an unapologetic perfectionist in which case this probably isn’t the blog for you.
Point is: there’s something magical about not getting too attached to an outcome, and letting your creativity take you away.
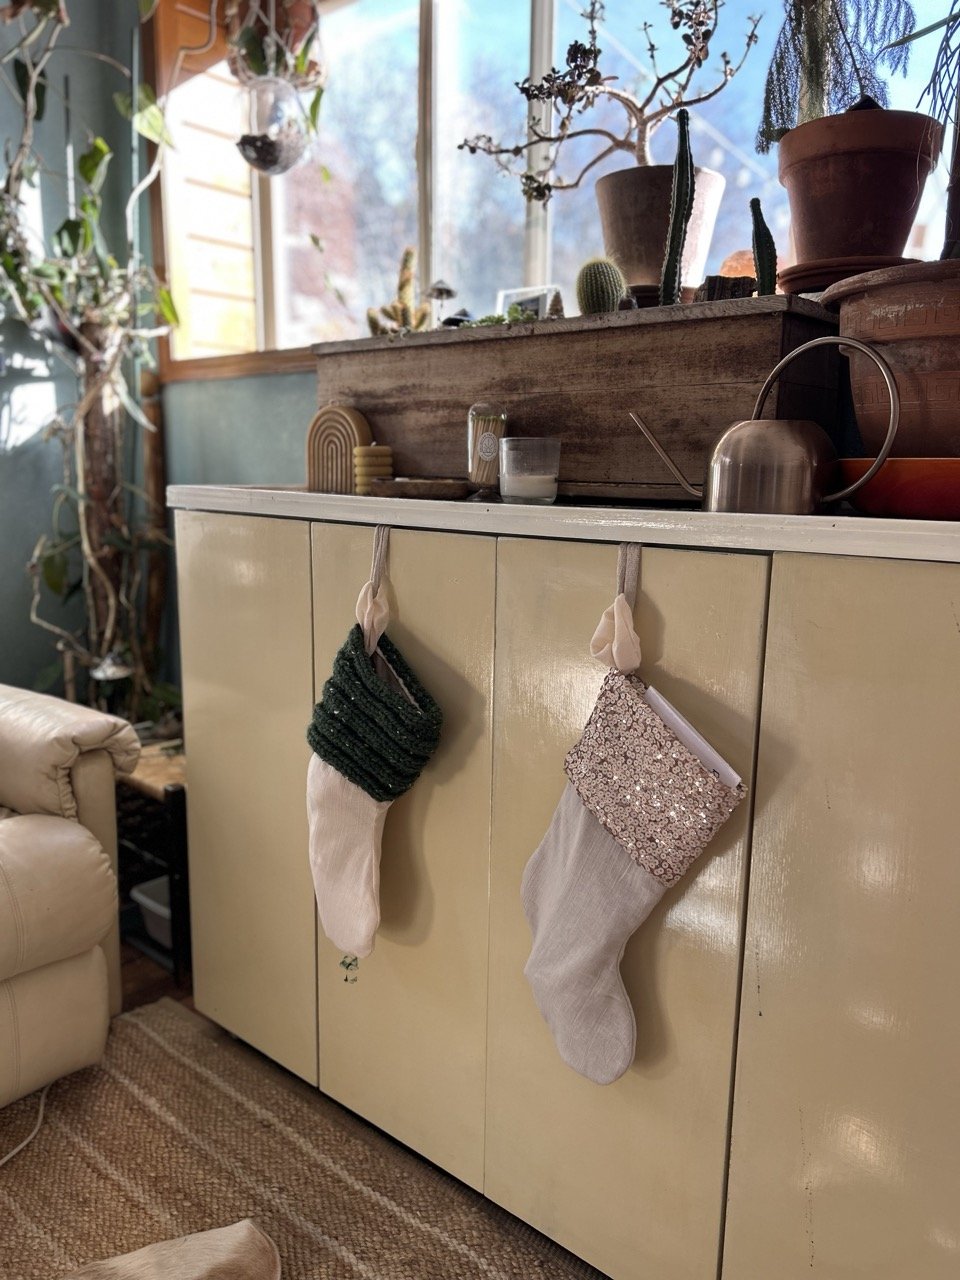
In my case, it led me to making two stockings— the second, for myself! With a pink sequin cuff!
All’s well that ends in pink sequin.
And now: the steps(ish):
The Linen Stocking
Sketch/print & cut a pattern
I sketched out my pattern. Print it here, or sketch your own about 18–20 inches tall and 8 inches wide at the widest point.
Trace the pattern & cut the fabric
Fold your lining fabric in half (right sides together, unless you’re linen-ing)
Trace the pattern with a fabric pen (or pin the stocking template to the fabric). Cut around it; I like a ½” between the line and the cut.
Repeat with the outer fabric. (Optional: For an extra cozy look, I eyeballed a ¼” extra around the edge of the stocking pattern when marking out my outer linen, and I doubled up with two outer layers instead of one.)
*If adding a fabric cuff instead of a knitted cuff or no cuff at all: Cut a rectangle of fabric (e.g., 18 inches wide x 12 inches tall).
Sew the stocking layers
Pin the outer fabric pieces right sides together and sew along the line, leaving the top of the stocking unsewn & open. Trim the excess outside of your seam (so satisfying, right?). Flip it inside out.
Repeat with the lining sides. No need to flip this one inside out.
*If you’re sewing a cuff instead of knitting one
Fold the rectangular cut of fabric in half lengthwise like a hot dog (right sides together) and sew the long edge to form a loop. Flip it inside out. Sew the ends together to close the loop, and flip it inside out again to get a nice seam facing outwards.
Combine the layers
Place the lining inside the outer stocking. Fold the unsewn edges twice in, towards each other, and pin the layers together around the opening of the stocking.
Sew the top edge
Sew around the opening of the stocking to secure the outer layer(s) and lining together.
Add the cuff
Pin the cuff in place around the opening of the outer stocking. You can sew it on with your machine, or tack it on with hand stitches in a few strategic places.
Add a loop
Use ribbon, yarn, or sew a little scrunchie using the same method as in Step 4 to make a loop and sew it on.
Adding any additional embellishments? Do tell!
I’d love to hear how it turns out—and what embellishments you dream up for your stockings. I’m thinking ducks in the snow will be a great addition next year…
TLDR;
The Train Ride – Finally took a cross-country train trip after dreaming about it for a decade. No red velvet seats, but plenty of charm—Uno with strangers, slow mornings, and a world where no one’s in a rush.
The Knitting Project – Spent 28 hours in my sleeper car listening to money podcasts, reading The Creative Life, and knitting a ribbed cuff for my husband’s Christmas stocking.
The Linen Stocking – Dug through my fabric stash (cue existential crisis) and landed on linen—timeless, soft, and better with age.
First DIY on Desk to Dirt! – Not a perfectionist’s step-by-step, but a cozy, creative guide to making your own stocking.
The Plot Twist – Made a second stocking for myself… with a pink sequin cuff. Full(ish) instructions included!

